Blog 03 - CA18DET Audi R8 coilpack adapter build
As some ca18det users may be aware, the stock coilpacks are really no good once they get old. I was having issues with spark blowout even at the stock 7psi with the plugs gapped way down.
You can purchase splitfire coilpacks for a pretty penny, or go aftermarket to smart coils, and ditch the ignitor at the same time.
I decided to go with Audi R8 coils - they are plentiful, cheap, and wiring specialities sells a pre-made adaptor harness for them. I think I only paid $100 shipped for 4 coilpacks from RockAuto!
Of course, I needed to make an adaptor plate to mate the coils with the CA engine, so the fab work began; I wanted something that resembled this plate available from Australia:

Yes I know, I could have just bought one. Buttttt I just got a milling machine and wanted to use it for something!!
I started off with some oversize 1/8" 6061 aluminum, and milled it down to dimension. I clamped it to a piece of plywood as a cheap fixture to hold it and allow me to cut fully through later on.

Next I could move on to drilling the holes for the coilpacks.

I center drilled them, then used a 1 1/2" HSS wood hole saw with lots of lube to drill out the holes. It suprisingly cut quite nicely and was accurate enough!
I used some scrap metal and a screw to help hold the plate down:

Used the hole saw for the remaining 3 big holes, then moved on to the mounting screw holes:

8 total drilled.

This little sketch kept me on point for tracking my rotations of the hand dials on the mill:

Next was some slots to hide the wiring harness under the cover:
 At this point, all the pre-planned operations were complete

After some de-burring, It was over to a spare head for the first test fit:

So far so good. A bit of extra meat near the rear, so I cleaned that up and added the fourth groove for the cylinder 4 coilpack:

With that taken care of, it was onto making some spacers that would connect this plate to the valve cover mounting holes:

First one down - I opted to have these press fit into the plate.

Used the hydraulic press to pop the test one in.

Had to create some relief at the shoulder, but the fit seemed good to go.
Now, 7 more to go.

All the same height, must have done something right!
Now I just needed to pop all these in on the press:

With that taken care of, the final bits to make were for the coilpacks. I cut some stock up on the bandsaw, and got to turning them down to size.

Facing:

Drilling:

Bored the ID and test fitted
:

Turned the OD:

And lastly, turned the shoulder for a press fit:

Parted that off, then made 3 more. This took a full morning on my little 120V lathe...
Back to the mill for some slots that locate the R8 coilpacks:

All 4 finished up!

Marked the alignment of the coilpacks so the wiring harness would line up with the slots I made earlier:

Then it was back over to the press to pop those in!

This was quite satisfying...
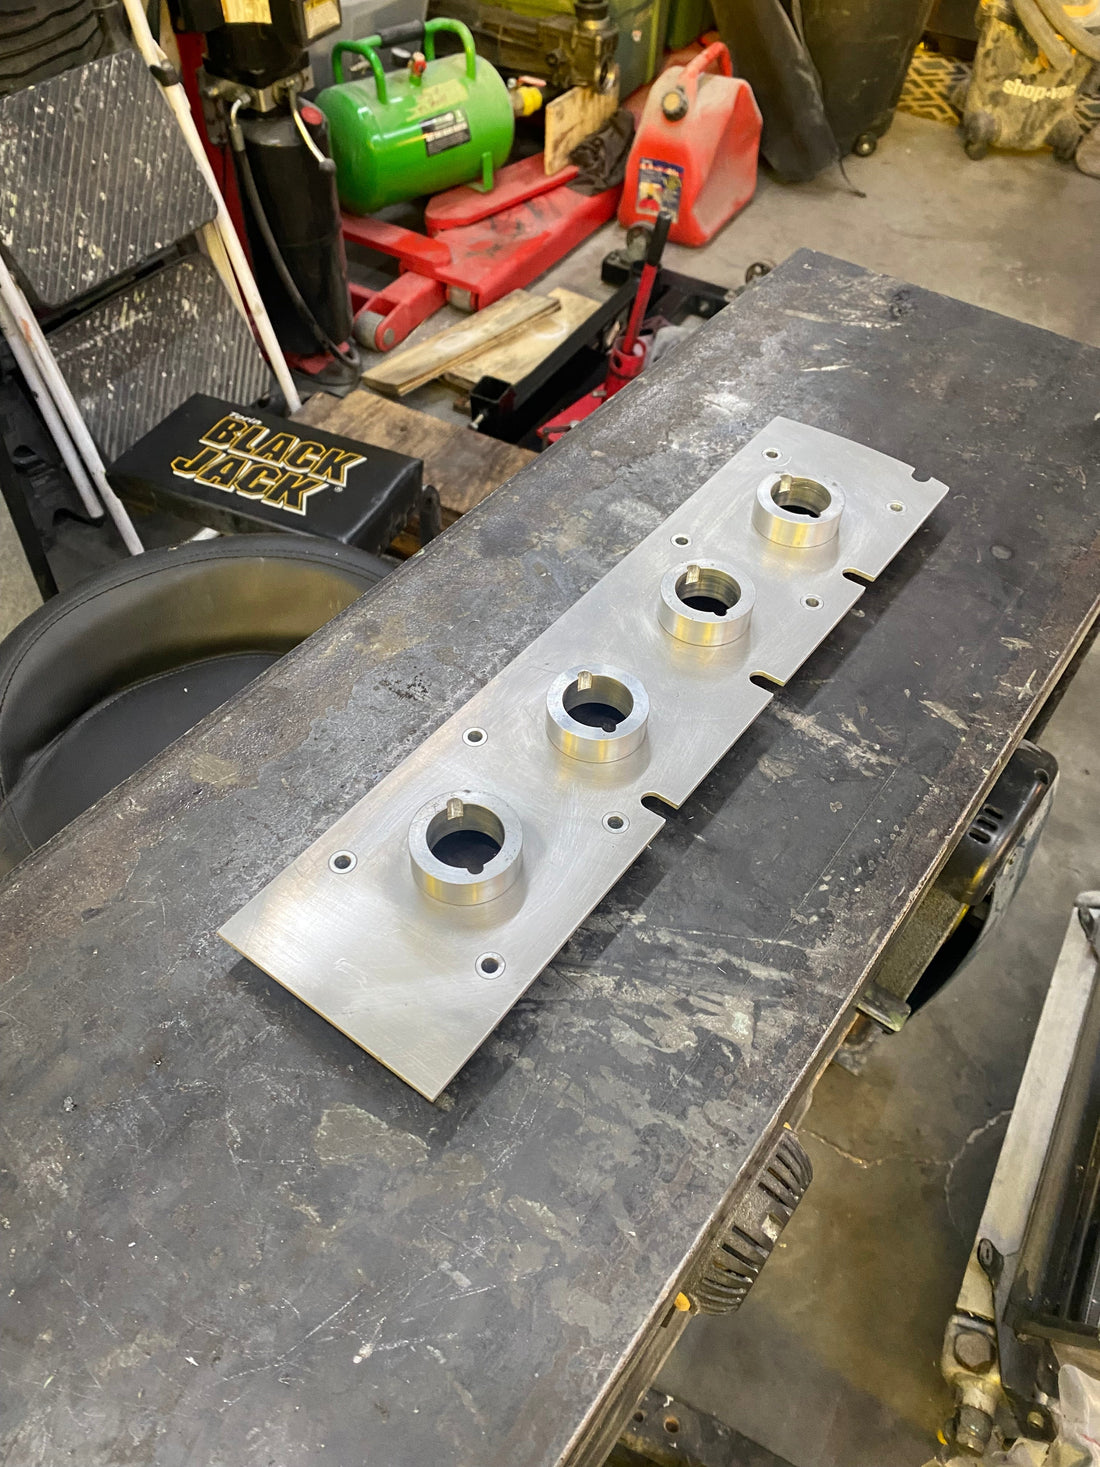
The R8 coilpacks require a fair bit of force to go into the bores, so I opted to tack weld these to the plate:

A look at the finished adapter plate:


Installed on the engine:


I'm quite pleased with how this turned out. I was going to powder coat it, but I think I'll leave it silver for now.
Here's how it looked on the new forged engine I was assembling:

Thanks for reading!
1 comment
Great work. Thanks for sharing the dimensions of the holes on the plate.
Going to machine one for our engine too. Maybe 1 piece aluminum on our DECKEL NC
machine. Again thanks for great info.
Sašo